Dec 15, 2022 App Development
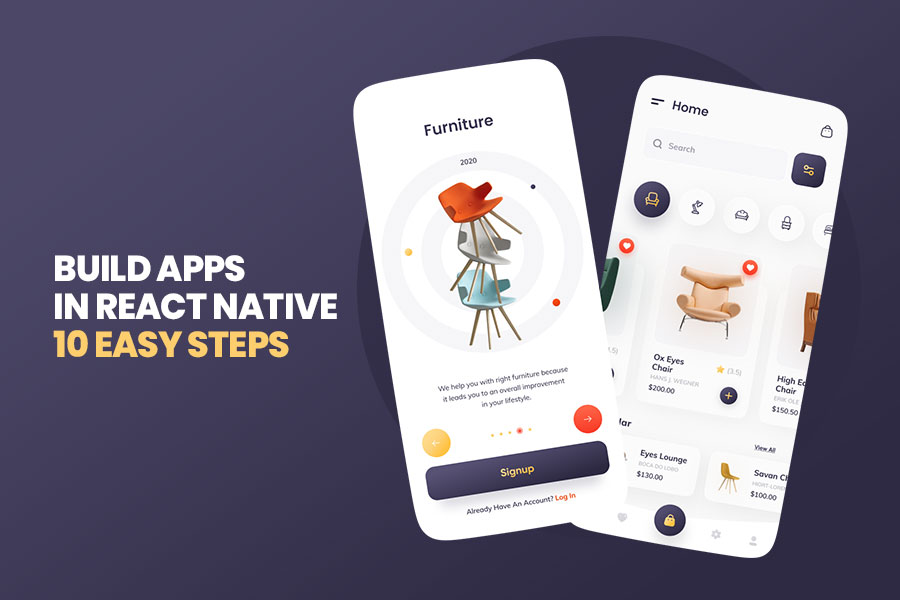
Build an App in React Native in 10 Easy Steps
Dec 15, 2022 App Development
Table of Contents
Dec 15, 2022 App Development / Neha Joshi
Are you looking to create a react native app with a user-friendly interface? React Native is a great choice for app development due to its intuitive design. With React Native, you can create apps for both Android and iOS platforms in a fraction of the time it would take to create a native app for each platform. In this blog post, we will walk you through the 8 easy steps to building an app in React Native. With the help of our step-by-step guide, you’ll be able to create an app that’s both efficient and visually pleasing. Let’s get started!
React Native is a popular open-source framework that is used to create cross-platform mobile applications using JavaScript. It is developed by Facebook and is based on the popular React library. React Native enables developers to create apps that are native to both Android and iOS platforms with one codebase, making it a highly efficient development process.
React Native has become an increasingly popular choice for app development, allowing developers to quickly create react native apps with user-friendly interfaces and optimized performance. Plus, with its ease of use, even those with limited coding knowledge can get up and running. If you’re looking to get started creating apps in React Native, here is an overview of what you need to know.
Here are some top benefits of using React Native for hybrid mobile app:
Fast Development Times – The time it takes to develop a React Native app is much shorter than the time it would take to develop a native app because they share code between platforms, with the exception of Android.
More Platforms Supported – You can use your existing skills to build mobile apps for iOS and Android without having to learn new languages like Java or Objective-C
Faster Updates – Updates can be pushed out faster as developers only have to update one codebase instead of two
No Frameworks Needed – With other frameworks, you need specific experience that is needed for building different types of apps but with React Native, you don’t need any extra skills
Less Code Required – Developers don’t need any special knowledge or experience because all the logic needed for mobile apps is already built into the framework
Support for Multiple Languages – Other frameworks require developers to know how to work with different programming languages, which could get complicated
Ease of Transitioning Between Platforms – Developers can easily transition between platforms
Not Locked Into One Programming Language – Unlike other frameworks, you’re not locked into just one language like JavaScript
Lower Costs/Higher Profits – When developing a native app, it costs more money up front and will cost more in the long run
Can Support Both Mobile And Web Apps – With React Native, you’ll be able to reuse code on both web applications and mobile apps
Building an app in React Native can seem like a daunting task, but with the right resources and knowledge, it’s actually quite simple! To help you out, we’ve created this 8 step guide on how to build an app in React Native.
Getting an idea for an app is the first step in building a React Native app. You don’t have to have all the details in place, but it’s helpful to at least have a general plan in mind. Take some time to think about the features of your app, who will use it, and what problem it will solve. Once you have a few ideas, write them down so that you have a starting point for the development process.
After drafting your app idea, it’s time to initiate the planning process for the components of your app, including deciding on the type of user interface (UI) elements you’ll use, such as buttons, text inputs, and images, with the assistance of a ghostwriting service. You should also consider what type of data your app will need to store, as well as how it will interact with external APIs or databases. Taking the time to plan out these components will help make the development process go more smoothly.
Building an app in React Native can be a daunting task. After all, there is so much to consider and so many moving parts to keep track of. One way to make the process smoother and easier is to utilize the Business Canvas Model.
The Business Canvas Model is a tool that allows you to quickly map out your app’s core values, target audience, unique selling points, and more. It provides a comprehensive overview of your app’s potential, helping you make the right decisions and avoid costly mistakes. Here are a few steps to take advantage of the Business Canvas Model:
Start by identifying your app’s purpose. What problem are you solving? What solution are you providing?
Establish your app’s target audience. Who will use your app and why?
Identify the core features of your app. What features will set it apart from other apps in the same category?
Brainstorm possible revenue streams for your app. What type of monetization strategies can you utilize?
Draw up a timeline for the development process. What milestones need to be achieved to ensure a successful launch?
Map out the user experience. How will users interact with your app? What design elements need to be included?
Research competitors in the same category. What strategies do they use to stand out?
Review your findings and make sure they fit within the parameters of the Business Canvas Model. Are there any gaps that need to be filled?
By taking advantage of the Business Canvas Model, you’ll have a better understanding of what needs to be done to build a successful app in React Native. You’ll also be able to identify potential issues early on and make adjustments accordingly.
Building an app in React Native is an exciting prospect, but it can also be a daunting task. There’s a lot of information to take in and consider when starting this process. Before you begin coding, it’s important to understand the overall framework and how each part fits together.
The Startup-Owner’s Handbook by Brad Feld and David Cohen is an invaluable resource for anyone looking to get into the world of app development. The book provides an overview of the entire process from conception to launch, as well as specific tips for the more technical aspects of app development.
If you’re serious about taking the plunge into building an app in React Native, this is an absolute must-have. The authors offer a wealth of information on everything from managing your team, marketing your product, and dealing with legal issues. The book also features interviews with several successful entrepreneurs who share their experiences with launching and growing their own businesses.
The Startup-Owner’s Handbook is an invaluable guide to starting your own business, and building an app in React Native is no exception. Whether you’re a novice or a seasoned professional, this book will help you understand the complexities of mobile app development. Investing in this resource will be sure to pay off in the long run, and put you on the path to success with your next big project.
Creating a wireframe, mockup, and prototype for your React Native app is one of the most important steps when building an app. It’s a crucial part of the development process that ensures your app works the way it should and looks the way you want it to.
A wireframe is a basic blueprint of your app’s layout and user interface. It typically includes all the essential elements of your app without getting into details of design or colors. You can create a wireframe by using a tool such as Adobe XD or Figma.
After creating a wireframe, you can create a mockup, which is a more detailed version of your wireframe. In a mockup, you can add colors and graphics to your app, which will help you better visualize how your app will look and work. Tools like Invision and Marvel can help you create a mockup of your app.
The last step in the process is creating a prototype. A prototype is a realistic version of your app that you can test out before launching it. Tools like Flutter and Expo allow you to quickly create a prototype that looks and functions like the finished product.
Designing a landing page is an important step in creating an app with React Native. The landing page will be the first thing that your users see, so it’s important to make sure that it looks great and makes a good impression.
Your landing page should contain the basics about your app such as its features, pricing, and contact information. It should also include an attractive design that will draw users in and make them want to explore more.
To design your landing page, you can use React Native’s inbuilt styling system. This allows you to easily add images, text, and even animations to your page. You can also customize your page by adding custom components, like buttons, input fields, and menus.
If you don’t feel comfortable building a page from scratch, there are plenty of templates available online that you can use. Just make sure to customize them to fit the look and feel of your app.
Once you’ve designed your landing page, don’t forget to test it out on different devices and browsers. This will ensure that your users have the best possible experience when they visit your app.
Designing a landing page may seem intimidating at first, but it’s not as hard as it looks! With some time and effort, you can create a beautiful page that will make your users excited to explore the rest of your app.
Creating the backend for your React Native app is an important part of the development process. Without a backend, you wouldn’t be able to save user data or implement any other features that require server-side interaction.
Fortunately, building the backend for a React Native app is not too difficult. You can use a variety of frameworks and services to set up a server and database that will power your app.
In this step, we’ll be focusing on setting up a Node.js server and MongoDB database.
First, you need to install Node.js and MongoDB on your machine. Both of these technologies are open source, so you can find installation instructions on their respective websites.
Once you have Node.js and MongoDB installed, you’ll need to create a database and some tables that will store your app’s data. This process can be done through the MongoDB shell or with a GUI such as MongoChef.
Next, you’ll need to write some code to connect your Node.js server to your MongoDB database. This code can be written in JavaScript and is fairly simple to understand.
Finally, you’ll need to create the API endpoints that your React Native app will use to interact with the server and database. You can use a framework like Express to quickly generate these endpoints.
By following these steps, you should now have a fully functioning backend for your React Native app. Once it’s up and running, you can start adding features and building out your app!
New react native developers are better off using the Expo CLI, while experienced react native developers can use the React Native CLI. The example mentioned in this article shall use the ExpoCLI.
Installation of Node12 LTS
Install EXPO CLI through NPM.
Launch the Expo CLI and run the following command:
Install Expo Client on an Android or iOS device.
Ensure the Mobile device and the computer are on the same network.
Open the project with a QR Code
Although the procedure for building Android and iOS apps differ, we shall focus on the basics in both cases.
Creating a React Native App for android application development
Get the Android SDK and configure it.
Install Android Studio and configure it
Install all the necessary APIs
Choose the Platforms you want React Native to Support
Choose the required SDK build tools
Choose the necessary Android SDK tools
Choose Google Play Services
Test your app on a real or virtual device.
Creating a React Native App for iOS
Get your money ready because developing for iOS costs money.
Get a MacOS or iPhone
Install Xcode app
Create an Apple Developer’s Account for $99
Plug your device into your computer USB
Select your project within the XCode app.
Create your mobile app and run it.
Connect your system to the Apple development server.
Launch the developer’s menu
Activate Live Reload.
Beta-testing is an important step in the development process of any app, and React Native apps are no different. Beta-testing can help you find and fix bugs and make sure your app works as intended.
Before beginning beta-testing, it’s important to define your testing goals and create a timeline for when you’d like to have testing completed. You’ll also want to plan out how you’ll handle bug reports and other feedback from testers.
Once you have a plan, you can start recruiting beta-testers. You can use services like TestFlight, or you can reach out to members of your network who may be willing to help you test your app. You should also consider using automated testing tools like Appium or Selenium to test for bugs that your human testers might miss.
When your beta-testing period is over, it’s important to thank all of your testers for their help. Collecting feedback and following up with bug fixes and feature improvements is also a key part of the process, so be sure to take the time to do this after the beta period ends.
Beta-testing is an important step in the development process and it can help you launch your app with confidence. With a well-defined plan, the right tools, and a great group of beta-testers, you’ll be ready to go live in no time!
App SEO (Search Engine Optimization) is an essential part of marketing your app, as it helps ensure it shows up in the search engine results. If your app isn’t optimized for the keywords people are using to search for similar apps, you won’t get found by potential users. Here’s how to optimize your app for SEO:
Decide on a primary keyword or phrase that most accurately describes what your app does and optimize all text with that keyword.
Add metadata tags to provide information about yourself and your app like title, description, language, author name, and categories. The more tags you include in each category, the better chance you have of being discovered through Google searches!
Add images so that when someone performs a Google search they can see what your app looks like right away! Include images with descriptions to showcase specific features or add screenshots from inside the app while describing what they show.
Congratulations, you’ve made it to the last step! After spending so much time and effort on your project, you’re finally ready to launch your app. Here are 8 easy steps you need to take to make sure your mobile application is a success.
Create an App Store Optimization (ASO) Plan: ASO is essential for helping potential customers discover your app in the app stores. Research keywords, write catchy copy, and create a visually appealing icon to make your app stand out from the competition.
Promote Your Mobile App with Paid Advertising: If you want to increase downloads of your app quickly, then paid advertising could be the answer. You can choose to promote with Google Adwords or Facebook Ads which will help get people interested in downloading your app.
Use Product Hunt to Build Buzz About Your Mobile Application: Product Hunt is a social media site that allows users to share new products they like or want feedback on while generating buzz about their apps with other users of the site who may have never heard about them before due to some clever marketing tactics.
Sponsor relevant podcasts, blogs and YouTube channels: By reaching out to podcasters, bloggers and influencers in your niche, you’ll be able to find a supportive audience that will enjoy receiving information about your product. As long as the podcast/blogger/YouTube channel has enough followers and views, sponsorships should prove effective at generating interest for your app.
Reach Out to High-Profile Users Who Can Provide Useful Feedback on Your App: When releasing any type of digital product into the world there’s always room for improvement and user input plays a huge role in this process by identifying these opportunities early on so they can be fixed as soon as possible. That’s why it’s important not only to build relationships with influencers who can provide useful feedback but also consider giving high profile users access through beta testing programs.
Creating an app in React Native is not a difficult one, but it does require some knowledge of the platform and the coding language to ensure that the app is functioning properly. By following the ten steps outlined above, anyone with basic programming knowledge can create a powerful, interactive app that works well on both iOS and Android devices. If you face any difficulty, you can take help from a react native app development company.
The goal of creating an app in React Native is to make an application that looks and feels as though it was designed specifically for the platform, no matter which operating system it runs on. This allows users to have a consistent experience between devices. Furthermore, using React Native allows developers to quickly create prototypes and apps with minimal effort, making it a great option for anyone looking to quickly build an application.